Showing posts with label x-men. Show all posts

Monday, May 20, 2013

White Queen AAR - Lessons Learned and Next Steps

Writing a few quick after event thoughts (what the DoD calls an AAR for After Action Report) while they're still fresh in my head on what worked, what didn't work, and why.

1.  Need new boots!  The shoes I had, while barely seen under the spats, were just some cheap Mary Jane heels I'd picked up around Halloween for $15 on eBay.  Great look, but definitely NOT made for 10-12 hours or more on your feet.  These need to go!  Already found a pair of vintage white leather ankle-length laceup boots on eBay, so that's resolved.  Of course, this will also mean I need to trim or sew new spats...

2.  Web Cloak worked brilliantly.  I wasn't sure about the spider-web type fabric and how it would look - up until this weekend, I'd used a more basic white linen that breathes and drapes well.  Spider web fabric was a royal pain in the white backside to work with, but really looked beautiful.  So that was clearly a win.  The main danger here is that it tends to catch on things very easily - ratchets, canes, car doors, pretty much anything that sticks out even a little bit.  Still worth it though.

3.  Corset needs to be lined.  Up side to beautiful handmade corset - looked amazing and gave me plenty of support throughout the entire day and well into the night.  I know a lot of people ask me if corsets are uncomfortable, and I always reply that if it's designed well and fits you properly, it's very comfortable.  The problem most folks have is wearing a poorly fitted corset.  In this case, the fit was dead on, but the hand-stitching of the grey applique wound up rubbing on my skin and by about 9pm, my skin was feeling pretty raw around the appliqued parts.  I think I'm going to take some felt and just bind that with rubber cement to the corset, to prevent future rubbing and cover over the seamed areas.  Alternate plan is to get some sort of waist cincher or Spankx just to wear around my waist under the corset, but I think the felt is a better long-term plan.

4.  Develop a cool weather version of cloak/coat.  Again, really pleased with my existing cloak - but because it's so open (and one of the only pieces that's synthetic rather than a natural fiber), it won't retain heat worth a fig.  By the fall, I'm hoping to make a wool coat version like this, to capture both the Steampunk flavor and also provide more warmth.  The trick here is going to be finding a white wool that's as close to true white as possible....wool in particular tends to run very warm/ivory, like the fox fur in v1.  For the design, I'll be copying the Emmeline Frost coat in Earth-889 of the X-Society version of X-Men, as shown below.

Emmeline Frost and the X-Society from a Steampunk alternate universe called Earth-889.
Next step is clearly sewing Ian one of the other outfits.

5.  Sew the long skirt from the Earth-889 picture above.  This clearly calls for dupioni silk.  Added bonus, if I ever get bored with doing the White Queen at costume cons, it will also double perfectly as a Mystique skirt.

6.  Boffin-ize Emma.  By next year, I'm hoping to have a secondary version of the White Queen, keeping some elements but adding in others for differentiation.  I've been a big fan of the Leviathan series by Scott Westerfeld, and one of the more interesting characters is Dr. Emma Nora Darwin Barlow, a geneticist and (fictitious) granddaughter of Charles Darwin.  She's known for being a brilliant scientist, fluent in multiple languages, and always impeccably dressed with a black bowler hat.  Ever since my husband bought me the first book in the series, I've wanted to do some sort of version of Nora Barlow and just never got around to it.  This is a perfect costume melding for me of two characters I love - Emma Frost, and Nora Barlow (who oddly enough is *also* an Emma - never knew that until today!).  So by next year, I want to incorporate:

  • a long white walking skirt, likely wool or cotton twill.  Possibly with a mermaid tail, verdict is still out.
  • a white felt bowler, which I will try making my own from boiled white wool felt using the instructions here.
  • a pair of white goggles - again, going to see about making these, but plenty of suppliers if I can't figure it out.  Worst case, I can get a pair of cheap plastic ones and dry-brush them white and silver.
  • a silver and white walking cane.  Plan is to find some stainless steel plumbing pipe, a nice crystal or white enamel doorknob, and some epoxy - if it works out, I'll post pictures and instructions.
7.  Sew a formal/ball-appropriate skirt.  The short version is perfect for the day, but I'd love to do a really fantastic, full-skirted affair for evening wear.

8.  Wig?  I've been very on the fence about getting a long blonde wig.  I am blonde in the world of reals, though not quite as blonde as Emma - more medium to dark blonde than pale.  On the one hand, it would certainly help cement the look.  On the other hand, good wigs are *very* pricey, and cheap wigs look tacky and I find them a bigger distraction than compliment to most outfits.  Plus, I'm not sure my coloring is cool or fair enough to pull off the pale blonde.  So still mulling this one over...

9. Insanity time.  Once I finish everything else, and decide to well and truly take leave of my senses - I want to make the Lulu skirt, (outfit?), though in white and grey.  Already have the corset, the overdress is very straightforward and I could sew that easily enough, white stockings are readily available...so it's just finding white and grey leather to make the buckle skirt.  Easy, right?  /cues famous last words

Someday, I will do this.  Someday...

Because sanity is *clearly* over-rated, and what could possibly go wrong sewing an entire skirt out of nothing but leather straps and buckles???
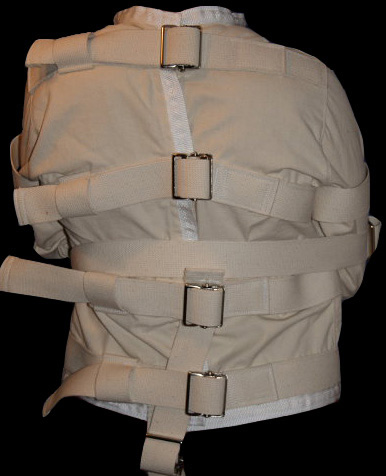
The more likely result of me wearing something white and with buckles if I try the Lulu skirt...
Anyway, for any costumers or steampunk fans out there, please feel free to offer suggestions, post your own costuming sites or tips and tricks, or whatever!  One of the best parts of the community is the modding and collaborative nature of it, so I love learning what other people have tried, what worked, what didn't, and comparing notes.  Thanks!

Tuesday, November 6, 2012

Making Your Own Spats

Today, we begin getting into the crafting process.  With my White Queen adaptation, as I mentioned before, I try to think about what are some of the key elements in a costume to adapt, and begin working from those first.  In this adaptation, one of the core visual elements are the thigh-high white boots of the original White Queen costume.

In Steampunk, this can be expressed two ways.  One is to keep actual boots as part of the ensemble - either actual white thigh-high ones, such as those made by Pleaser and available on Amazon or eBay, or to do something more Victorian such as a lower heeled, lace-up boot like these at Wild West Mercantile.  Boots are perfectly steampunk, and there are an amazing number of options available, thanks to the internet.

However, if you're on a tighter budget or just want to really customize the look, you can also accomplish the thigh-high white boot look by making spats instead.  This is probably the easiest sewing project of all those I've done for the outfit, and a great way to slowly dip your toes into sewing fitted garments.  (Though in fairness, the cloak might be the easiest sewing element.)  So - how to make spats!  Thanks in advance to Phineas and Hera von Hedwig of the Steampunk Family for quite literally teaching me everything I know about making spats.

The first step is to get yourself some newspaper and some duct tape.  Ideally, a willing partner makes this a lot easier, too.  The best fitting spats patterns - especially ones going halfway up your thighs - are going to be those custom fitted to your body, as they'll fit best and stay up better than something you can buy online.  Also, most of the white spats I've found online are astonishingly poor quality, so I'd avoid those.

What you want to do is to wrap the newspaper around one leg, wearing the shoes you plan to use with your outfit.  This is important, as your legs will change shape if you're wearing heels or flats, etc - so make sure you've got on either the shoes you will be wearing, or something at least about the same height.  Hold the newspaper around your legs (you can work a section at a time if that's easier), and then have your buddy take the duct tape and start taping it to you, fitting it to your leg.  I find starting at the top, at the widest point of your leg, is probably the easiest and then working your way down.  You don't have to cover your entire leg in duct tape - at the very least, you'll want to get the highest/widest part of your leg, above and below the knee, and then around the ankle and foot top/toe area.  Taped in?  Great!

The next step is to have your fitting buddy take a Sharpie (or other marker of your choice) and draw three lines on the duct tape/newspaper combo.
- One down the front of the leg, from the top all the way down to the toes
- One down the back of the leg, directly opposite of the front seam you just drew
- One on the outside of the leg, probably about an inch towards the back rather than directly on the side - though this is up to you.  This will be your side (and the opening of the spats), so you'll probably be sewing some sort of buttons or decoration to it - which is why I recommend pushing it about an inch or so back, so the buttons can go on the side.

All done?  Great!  Now either have your buddy cut you out using EMT scissors, or you can slide the pattern off (CAREFULLY) and cut it with regular scissors once it's off.  EMT scissors work because they're designed not to cut skin and so you don't have to worry about getting stabbed with pointy things.

Next step - cut along the seam lines you have traced.  This should leave you with three spats sections - inside leg, front outside leg, back outside leg.  I then take these and trace them onto brown tracing paper (like you can get here), though if you don't have any you can also use either buck-a-yard muslin or even paper grocery bags you open up and lay flat.  Now, take each pattern piece you made, and trace them onto the paper or fabric you're using to make the pattern.  After that, trace a *second* line around each of these at 5/8" (or whatever you use for your sewing seam allowance).  For those new to sewing, the seam allowance is the amount of extra fabric you cut to sew together when you're assembling your garment - it's very important, because if you do not add a seam allowance then everything will be too small to fit you!  Also on the opening side, you may want to add about an inch or so extra, especially if you're sewing in buttons and button holes.

So now you have three paper or fabric pattern pieces.  I recommend labeling these, so you know which fits where.  Now to the actual sewing.

You'll want two fabrics for your spats - some sort of heavy duty cotton or canvas for the actual spats, and then a lining.  I definitely recommend felt for the lining, as it's cheap and can take a lot of abuse - and also, it helps cling to your leg a bit better, especially if you wear stockings or nylons underneath your spats.  For the outside, I like cotton twill - it breathes well and washes easily.

Once you've selected your fabrics, cut 2 of each piece from both fabrics - making sure you're either cutting folded fabric or reversing your pattern pieces for the second set, so that you're getting a left and a right spat and not just two right or left ones.  Then you assemble each spat - leaving you with a left and right outer fabric, and a left and right lining piece.

Match right sides for each spat, lining and cover, and then sew the edges closed, leaving either the bottom of the spat open or a gap somewhere.  When you finish, turn each spat inside out, press the unfinished edges into each other with an iron, and sew these close with a straight stitch.  This should give you two completed spats!

Now on to the fasteners/closures.  You have a few choices here - the simplest I've found, especially with the thigh-high spats, is to use velcro.  It makes the spats easy to put on and take off, and won't be visible since it's sewn inside the closure.  I then sew decorative buttons to the outside to give a good look to the spats, but use the velcro to get in and out of them.  Your other alternative is to actually sew the buttons and button-holes, the buttons being sewn to the back outside panel and the button holes being sewn to the front outside panel.  These are arguably more authentic and slightly better looking (if someone's getting that close to your legs), but definitely make putting them on trickier.

The final step, after buttons or velcro are sewn, is to attach a shoe strap - you can use some of the leftover fabric from the spats, or a strip of leather if you have it.  Just sew this on the bottom of each spat, so that it connects under your shoe and holds the spat over your foot.  If you wear your spats a lot, you may need to replace these as they will wear out (and get dirty) over time.

And voila!  You now have a tall pair of thigh high (or knee high, if you prefer) spats to wear with your outfit.

(Pictures to follow later.  Thanks!)

Thursday, November 1, 2012

Deconstructing the White Queen


As the title of the blog may indicate, one of my many hobbies is steampunk costuming.  For those not familiar with steampunk, it's basically Victorian science fiction - the future, as imagined in the late 1800s by writers such as Jules Verne, HP Lovecraft, and Orson Wells.  Also, there are often a lot of buckles and gears (for reasons I can't entirely explain)....

I've been trying to do more serious costuming and sewing recently, both to develop my own skills (and maybe even get to the point where I can sew well enough to make real life clothes too), and also because it helps being able to make the items you can imagine rather than relying on others to do so and hope they get it right.  I had the idea at Baltimore Comic Con of trying to do a Steampunk version of the X-Men's White Queen, formerly of the Hellfire Club and now one of the leaders of the X-Men Academy.  How times change, right?

Now, the goal when I try to adapt an existing character to a steampunk version is to meet two criteria I have for "successful" costuming:

1.  Does it look properly Victorian/Steampunk?  (AKA does it look good)

2.  Can people tell who you're actually supposed to be?

Obviously the first rule is fairly self-evident - did I make a costume that looks pretty, and that I'm not embarrassed to wear?  Oddly enough, this is the easier part of my two criteria - making something that looks good and fits well is a fairly straightforward enough goal, with enough practice.  In the picture above, there are definitely things I want to still improve - the cloak I think came out very well, and I'm very pleased with that, but the corset fit could stand some improvement.  Regrettably (I think), there's a little more me than the top allows for, so I could stand to enlargen that part.  I used lace as a quick-fix to get a bit more coverage on the bust area, but in an ideal world I'd like it to fit better - enough so that I'm not terrified to bend over.  Also, while you can't see the skirt (as I had my cloak covering my legs here), it's one of two pieces that were *GASP* store-bought, and I need to make a proper, draping Victorian skirt to really make this work.  The boots were also purchased, but they are leather and my leatherworking skills in no way extend to making footwear - so this, I can live with.

The second part of the equation is the trickier one - can people tell who it is you're supposed to be a Steampunk incarnation of?  I'm pleased to report that at least three people at the party from above did compliment me on my Steampunk Emma Frost outfit, so I think I'm on the right track so far. I was worried people would ask if I was supposed to be some sort of bride (all in white, after all) - and only one did, so as long as more people can correctly recognize the character, I call it a win!

For those not familiar with the character, this is a fairly iconic version of the original White Queen (in her pre-good girl Emma Frost days):


Now obviously, I wanted to tame it down some - no way at my age I want to be prancing around in a little bikini!  There's still a lot to work with though, and adapt for steampunk purposes.  As far as the individual components of the above - the first thing I tried to do is identify the main or key elements of the original character, and adapt from there.  In the White Queen's case, there are really three main parts to her classic outfit that stand out visually.  One is the long cape with the fur collar, the second being the front-lacing corset, and the third being the very tall white boots.  So that's where I tried to begin, in terms of developing the costume - items that I needed to keep very prominent in my adaptation so as to recall the original.

The boots, for now I just kept as long white leather boots.  I did actually sew a pair of thigh-high white spats, to see how those would work out in terms of incorporating the look but adding more steampunk flair, but I didn't finish them before the party - so those are for v2.  The corset I made, though I stayed with a traditional back-lacing corset rather than a front-lacing one as this was the first corset I've made.  The cape, I decided to construct out of white linen, to be lightweight and breathable, and then added a vintage fox fur stole I found on eBay.  I went with linen rather than wool because it runs a little more true to white (wool can run more cream-colored), and also because most Steampunk events and comic cons tend to be in the warmer, summer months than the winter ones.  Plus, I can tell you wearing it on a cooler evening in October - even with the linen cloak, the fur will definitely keep one warm!

What I'll try to do in the coming weeks is to draft out patterns for what I did and how, in case any other aspiring Steampunk costumers ever come across this and want to try working on their own character adaptations.  For now though, I figure even posting this much is a start!